|
|||||||||||||||||||||
|
|
|
|||||||||||||||||||||
|
|
|
|
|||||||||||||||
|
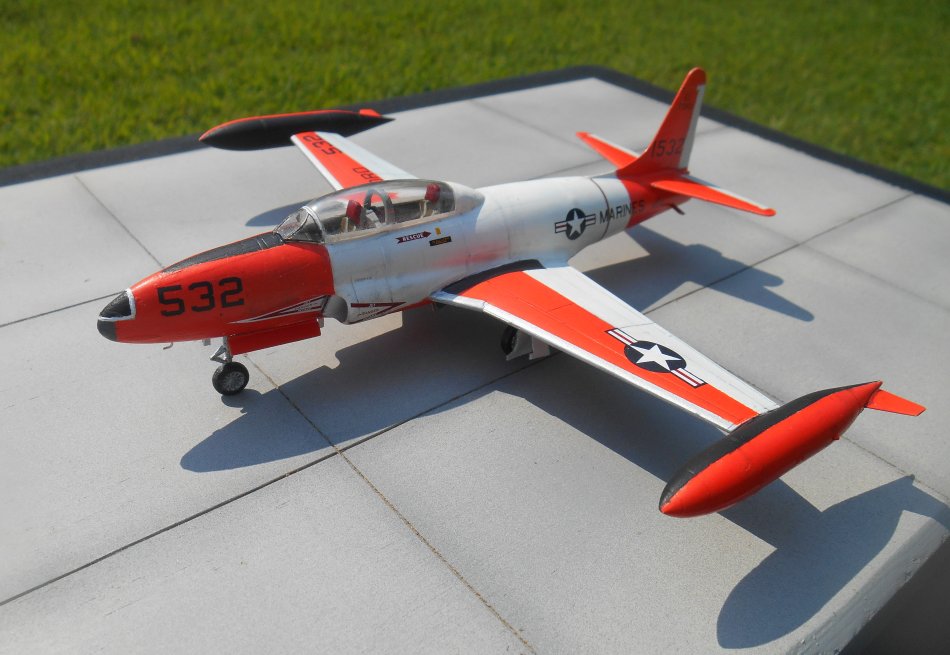
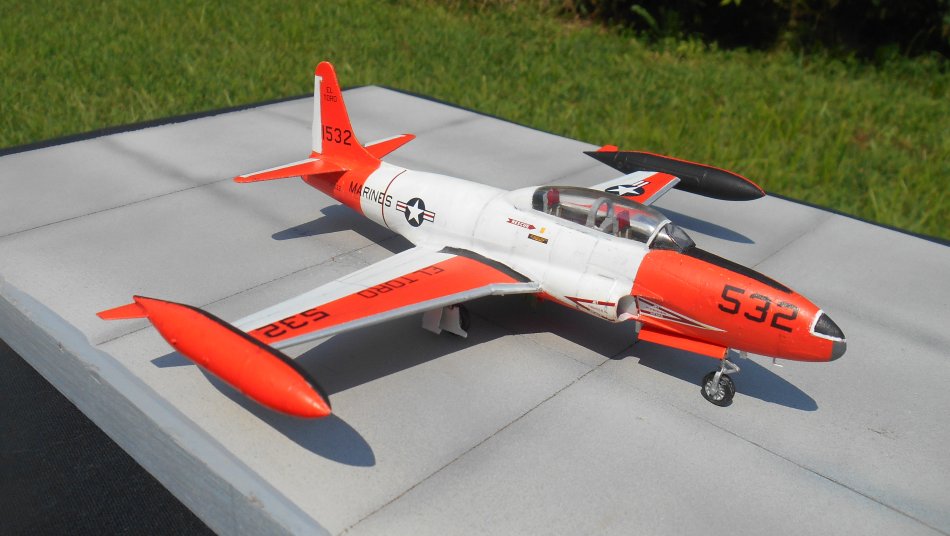
T-33A Shooting Star USMC, El Toro, Calif.
The cockpit, although on the Spartan side, is adequate for the smaller scale and has raised consoles: one can either paint the consoles, or file off the raised plastic and use after market decals. I prefer to employ the raised option, as it gives more of a 3D look. The parts fit was exceptional, with little to no putty required; I only used a little where the full length wing mated with the fuselage. The above positive aspects mentioned, there are some drawbacks to the kit, mainly with optional part location: for one, there are no landing flaps to attach in deployed (i.e. "down") position; for another, the one-piece canopy can only be assembled in "closed" position. If one is determined to leave the canopy open, one will have to microsaw the front canopy portion from the whole piece, then fashion a riser rod to hold the larger rear piece raised, . . . but the console to where the normal riser rod would be attached in the cockpit tub is not included in the part mix; one will have to fashion that part, too. For the kit price and scale, I left my canopy closed. I added some detail to the plain seats, namely seatbelts from masking tape. As a last example, the fine antennae molded on the fuselage part failed to withstand my sanding after gluing the fuselage halves; I had to re-create the antennae from scrap sprue and fine wire (for pitot tube).
Finally, I used an after market decal sheet from Iliad Design. The decals with the kit are the same that come with the 1/48 scale model, and I already used them on the larger models. The Iliad decals allowed me to depict a more rare Marine version of the trainer aircraft (ca. 1961), which to me is very appealing. The decals are hard to beat: they have a thin film, which promotes perfect blending with the plastic part. But on the down side, dont walk away with the decal setting in the water container, for itll separate from the backing and float in the water. Not good! Be sure to use a mild strength decal setting solution, if any is desired. I used Testors brand and it worked perfectly. I lightly weathered the model with Black Detailer, then wiped excess to achieve final desired look. A coat of spray dullcoat masking canopy first! was the last addition to the build. Carl Jarosz
|
||||||||||||||||
Photos and text © by Carl Jarosz