|
|||||||||||||||||||||
|
|
|
|||||||||||||||||||||
|
|
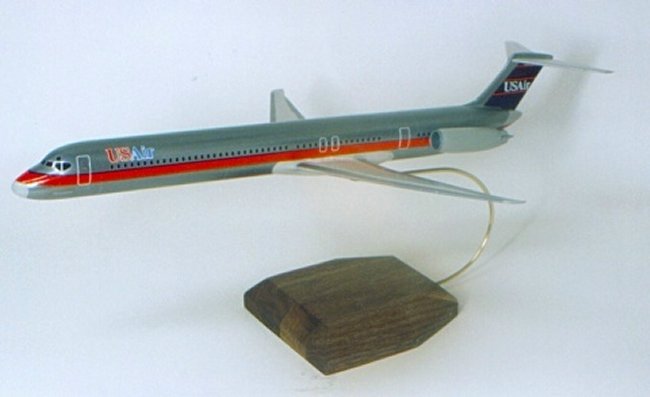
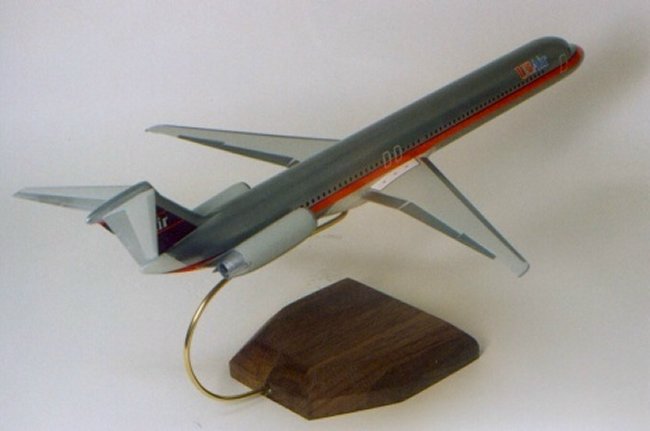
This is my second
Minicraft MD-80 and like the first attempt, this kit is not without some
challenges. I often build airliners for others who are in the aviation
field and I was pleased that Minicraft offered the US Air markings on the MD-80
as I get asked for it a lot.
Many former PSA pilots who are now with US Airways (the current rendition of
several mergers) were very fond of the MD-80 and this kit should sell well.
All went well until the decals. Although very thin and extremely dense in color, there are some problems. First of all, the port side didn't have enough windows. This seemed to have been made up for with the starboard side having too many. When the front half of the stripe/window pieces went together, the window problems become obvious. I left the port side alone and cut the additional window off of the starboard side. They also don't like to be moved much once they're on the model. I suggest, as always, getting them as close to their final location when sliding them from the backing paper. Secondly, the dark
blue stripe alongside the main red stripe is a different width from front half
to back. This is a very noticeable problem.
The windshield decal went down perfectly as did the tail markings. For all the problems with the decals, I would recommend this kit for the advanced builder, but otherwise anyone can handle the construction. I have about 30 hours in it and it was fun and very economical. Most of the time was spent on the bare aluminum finish which didn't work out as I had hoped. But that's another story.... Todd Wheaton
|
|
Photos and text © by Todd Wheaton