|
Having seen some fantastic builds
of the AM Avenger in the ARC gallery I had been meaning to get one for some
time and looked everywhere to find one. As rare as rocking horse
s***. So the call went out on the ARC forums and I managed to get
hold of one, thanks Graham.
This is probably the best kit I
have ever laid hands on, the detail is stunning and the moldings are crisp and
flash free. Also the instruction booklet was very informative a gave
great tips on building the model, and seems to have been written by a
modeller for a modeller.
|
Click on
images below to see larger images
|
|

|

|

|
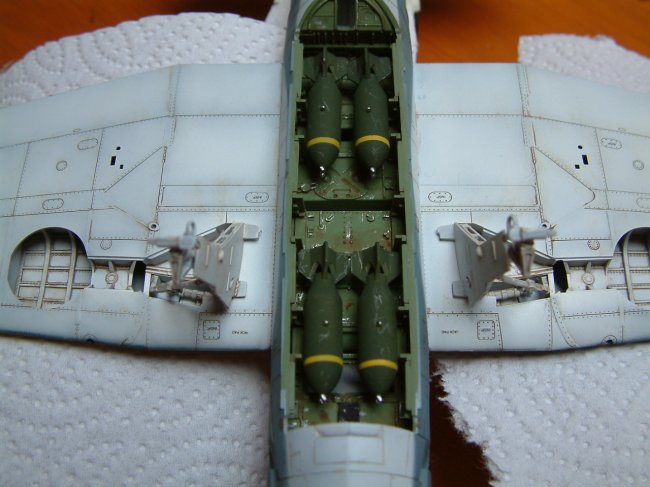
The build starts as
always with the vast cockpit area which having been sprayed cockpit green
was weathered with a little XF16 Silver for paint chips and a pastel wash with
brown/black was used. With some PE belts added this is the only other
detail needed. The fuselage went together with almost no seam another
testiment to the fine moldings by AM. At this stage the armament was
added and then wings and other flying surfaces. The engine having been
painted was inserted into the cowl and fixed complete to the fuselage. Then I masked
the various areas ready for painting.
The cockpit glass was probably
the most daunting part of the build, masking the 'greenhouse' can be the making
of the kit. True there are mask sets available but I decided to do it the
hard way with tamiya tape and a sharp blade. (just call me a masochist)
|
Click on
images below to see larger images
|
|

|

|
After preshading
the Avenger with dark grey the under surfaces were sprayed XF2 white. Then
using Intermediate Blue for the middle colour and finally Glossy Sea Blue for
the upper surfaces. A layer of future and then the 'many' decals which
when applied with future snuggled down well to the surface detail. Not
until I had applied the yellow on the nose I found out that I failed to mask the
area for the nose decal, but I would have to live with that error. A quick
brown panel wash and a layer of matt coat was then applied and with the
masking removed, it was ready for final assembly.
|
Click on
images below to see larger images
|
|

|

|
The rear turret assembly has
caused problems for many trying to make it fit, and I was no exception.
I can offer no tips as to inserting this item, I struggled trying every way
possible, but eventually it just popped into the opening. So just keep
trying and it will happen. Then just the final touches, aerial wire from
stretched sprue which needs to be made thinner, another little job which might
not get done!
So a brilliant kit of a BIG
aircraft and if you have one in the stash, get it built. I have recently
got the AM Dauntless so I hope to try that one soon.
Happy modelling
Pete
|