|
This
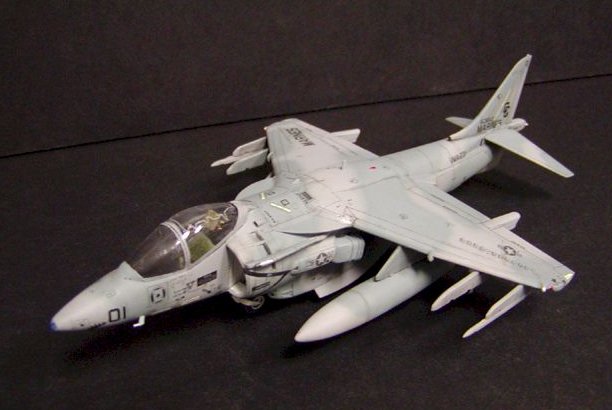
is the Hasegawa offering. It is OOB & the fit was great other than the
forward wing/LERX.
The instructions have you place the forward LERX hood on the fuselage and then
attach the main wing. I did and had a terrible step - I know, I know, a
little dry fitting would have identified that problem right away. What can
I say, sometimes I have trouble with the "shake & bake" kits.
I have three more on the shelf and won't make the same mistake with those.
I will definitely attach the LERX to the wing first and then put it on
the fuselage.
|
Click on
images below to see larger images
|
|

|

|

|
I
decided on the Gulf War markings of VMA-231 from Superscale. I
followed the camo scheme in the instructions and used Testors Model Master
enamels and Metalizer. The decals went on a coat of acrylic gloss and
went down great. The only kit decal used was the detonation cord on
the inside of the canopy. I was really worried about using it, but
tried it and was very pleasantly surprised with the results. I also used a
set of Superscale stencils and data markings. They stencils took a full
week of evenings to get all 200 on the bird! Once I was finished
I swore I would never do that again, but I found them on sale at Squadron
for $2 and bought 3 more sets for the kits on the shelf. Yeah, I am a
slow learner, but nothing looks better than a plane with full stenciling.
I
overcoated all the decals with another coat of acrylic gloss and applied an
enamel wash. I wanted the weathering to be light, so I left it kind of
clean. A coat of Testors Dullcoat provided the final flat finish. I
expect that one day I will get around to putting on the Sidewinders that came
with the kit. Hasegawa caught a little flak with the closed airbrake
& simplified hot exhausts, but I think it looks every bit like a Harrier,
and the open blow doors look great.
Semper
Fi!
Arrin
|
Click on
images below to see larger images
|
|
|
|
|
|
 USMC Birthday 2004