|
The I-5 was designed by N. Polikarpov when he was in
"Inner Prison" on false grounds. First flown in 1930, it served on
until being replaced by the more famous I-15 series biplanes and later the I-16. But
for it’s day the I-5 was one of the best fighters in the world. Because of its lighter weight,
it could out climb and out manoeuver the Bristol Bulldog
and Curtis P-6E hawk, it’s early 30's contemporaries. It also served in the
"Zveno" role, which is the Russian parasite fighter concept. A TB-1 or
TB-3 bomber would carry 2 or 3 I-5's and later I-15 /16's. It would launch
the fighters if attacked or when they reached the target to assist in the attack.
Thus allowing the "shorter legged’ fighters to protect the bomber all the
way to target. Or they could carry out the attack themselves. In all 803
examples were built and served up through 1941 in the advanced trainer role some
night bombing duties.
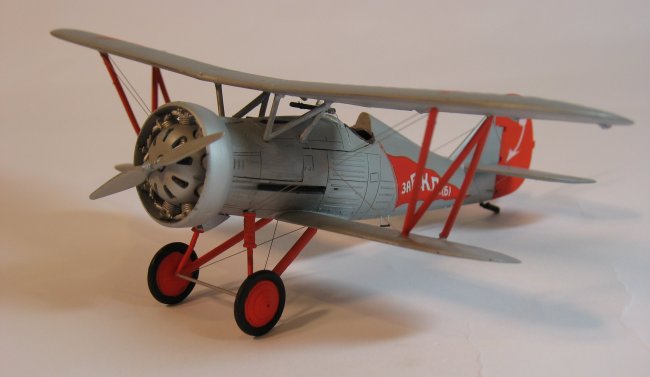
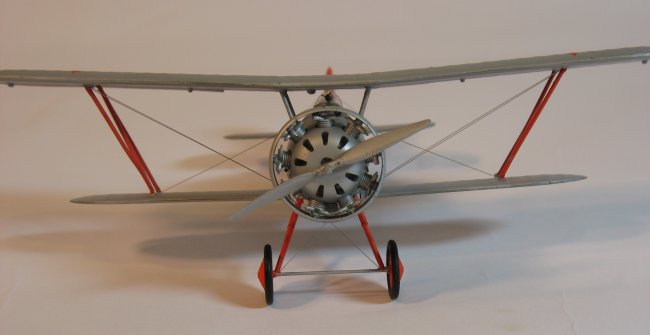
The kit is made up of resin, white metal and photo
etched parts. One will quickly notice the quality of castings upon opening the
box. No air bubbles or molding defects at all. Included is a nice instruction
sheet with a few black and white photos of the I-5 in service, and some nice
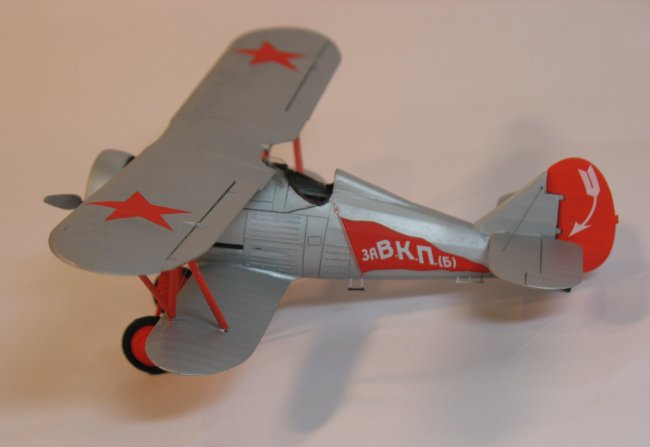
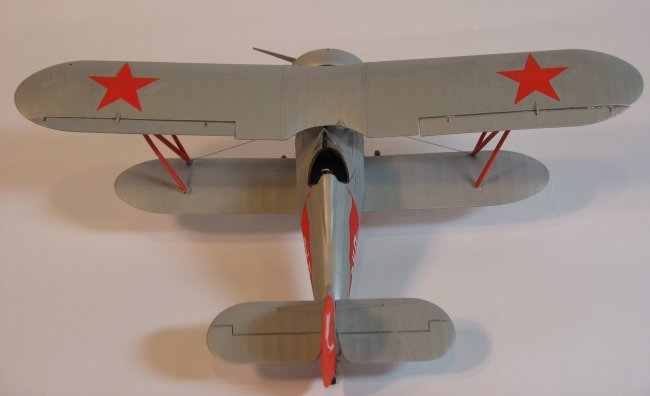
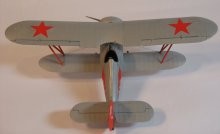
line drawings of the plane. Decals are for 3 versions. One red and silver
machine which I have built up here. And the other 2 are the standard
Russian Green over light blue camo.
|
Click on
images below to see larger images
|
|

|
 |
The kit goes
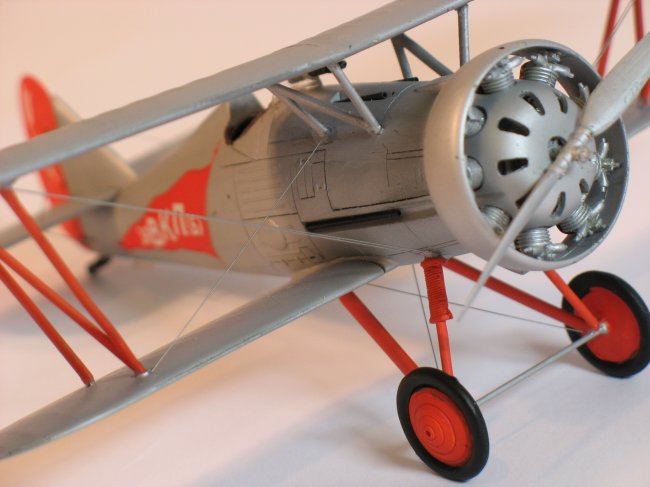
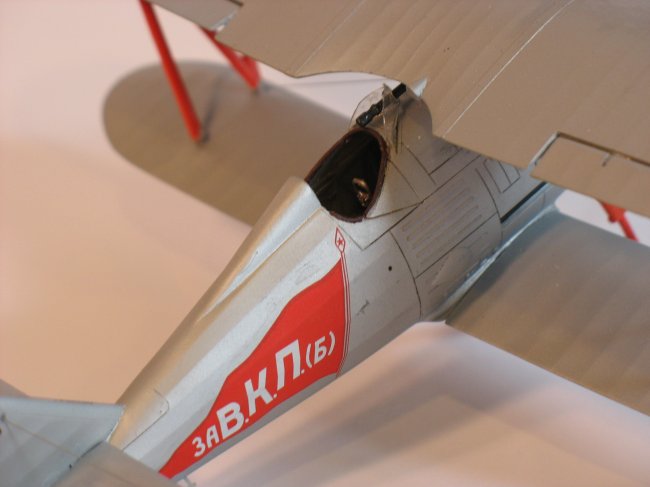
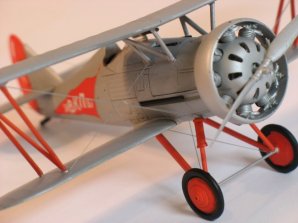
together super easy. The cockpit is PE and resin with acetate instrument dials.
Detail is excellent. Next on to the engine which is highly detailed as well. Just
needs a few push rods to dress it up a bit. Upon installing the cockpit the
fuselage was buttoned up. Fit was perfect. Not a drop of putty used. I next
installed the lower wings and tailplanes. I should note that you get a separate
rudder and ailerons. I left the upper wing, undercarriage and rudder off to ease
the painting process. I painted the model overall silver using Floquil railroad
Old Silver. I have always loved this paint for representing silver doped or
painted airframes. It provides just the right amount of sheen. Next came
some Model Master Marker red for the undercarriage and rudder. I let that dry a
day and clear coated the model with Future to prepare it for decals. I used the
kit supplied decals which went down well using the Micro set/sol method. There
is not a lot of markings on these airframes so the process went fast. One more
coat of future to protect them. Then a light flat coat to give the model a
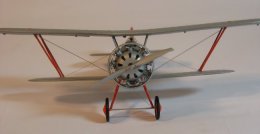
"satin" finish. Final assembly of bi-planes is always tricky. I
mounted the inner struts to the fuselage. Then the upper wing. After that had
dried, I carefully installed the outer struts. I attached the engine assembly
next, followed lastly by the undercarriage. Somehow I lost the tail strake and
had to fabricate one out of the spares box. I rigged the model with .006
"Sea Bird brand" wire available at Great Models. It worked great.
In conclusion, I would
have to say this is the nicest resin kit I have ever built or even seen in the
box. It goes together easier that most plastic kits with superior detail. Fit is
excellent. As good as a Tamiya kit. Some experience with resin and PE would be
helpful. As well as a bit of bi-plane experience, this being my 3rd.
I would recommend this kit to everyone except for maybe a total newbie. And
it's a definite must for any 30's era modeler or Russian airpower enthusiast. I
plan on adding the other little jewels from the Rest models line up to my
collection soon. You can check them out at www.coopersmodels.com
Thanks to Rest models for making
such a lovely kit. And also to David Copper at DMC models for providing the kit.
Todd
|
Click on
images below to see larger images
|
|
|

|
|
|