The
looks in the box looks great, however some mistakes are evident.
As
far as I know, these mistakes are now well known as the model has appeared in
many articles on the net and in magazines.
In
this first part, I shall correct the following areas:
-
1-The
representation of the fabric covered areas.
-
2-The
detailing of the interior.
-
3-Making
wheel wells.
-
4-Correcting
the wings slats area.
|
Click on
images below to see larger images
|
|

|
|
I
have in my Eduard sets, the 2 sets done for the old 1/50 Smer model. I
used parts from these sets where appropriate. First of all, I started
with the fuselage halves.
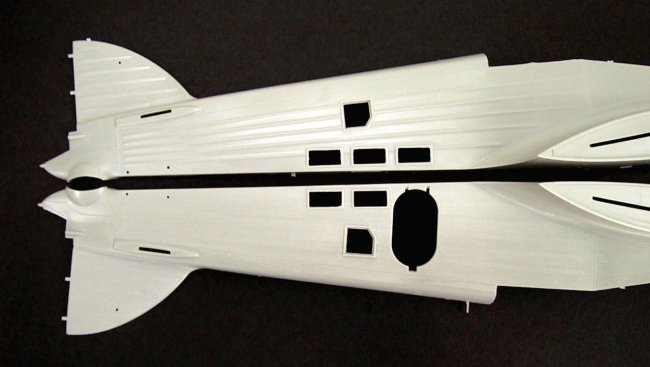
The
fabric representation on the sides of the fuselage are done incorrectly
I
sanded the lines and kept the traces showing. Look at the photo
comparing the right and the left half, which is sanded.
The
internal tube construction is done with raised detail. Good if you do
not open the entry door, however if you open the door, then some
detailing should be done. I did this with strip styrene and rod.
The
cockpit have 2 clean sidewalls.
I
treated them the same way with strip and rod.
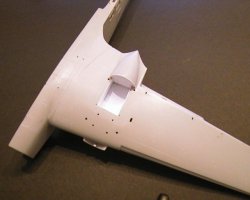
The
wheel wells in the model do not exist.....
Look
at the photos and see mine done using plastic sheet.
|
Click on
images below to see larger images
|
|
|

|
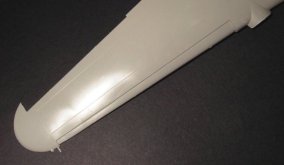
The
leading edge slats on the upper wing of the real airplane does not have a step
to retract into. It simply overlaps the wing.
So
I used a strip of plastic and closed the gap along the leading edge, leaving
only a small streamlined grooves on the sides where the slats meet the
wings.
That's
it for part one.
Keep
tuned for the second part which will cover more correction work (engines
and cowlings) and the painting and decaling of the model.
It
shall features markings of an aircraft that was used by the Lebanese AF.
Happy
modeling.
Emad
|
|