|
Most of you are
probably familiar with the Tamiya P-51D. This was my first time to build one. I
had a few improvements in mind for the basic kit.
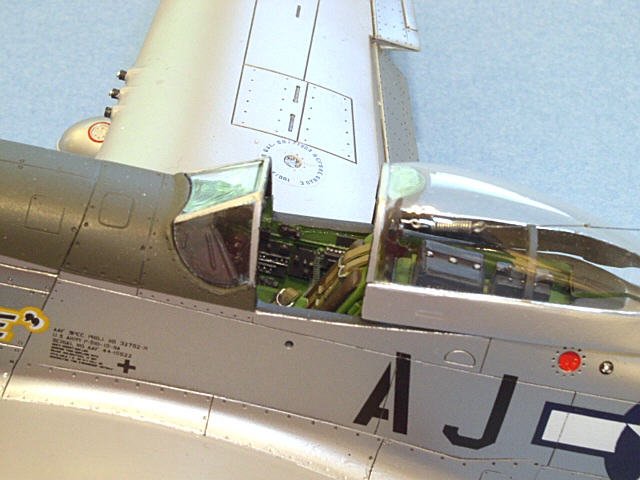
The first thing was
using the True Details cockpit interior. The fit was not bad, but I failed to
thin the sidewalls enough and had to do some repair work to make the walls not
look ridiculously thick. The only other thing I didn't like was the big support
beams going from the floor to the top of the seat that are molded into the True
Details set. I don't recall ever seeing those structural beams on pictures of a
P-51. Everything else about the set was quite good, including a nice gunsight.
|
Click on
images below to see larger images
|
|
|

|

|
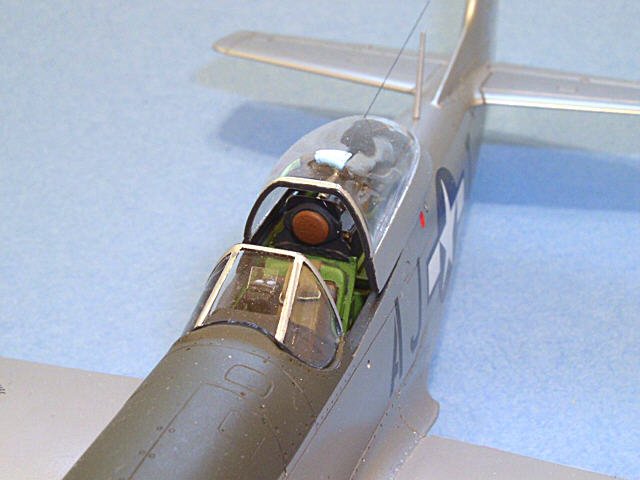
I also wanted to add
a spring inside the canopy to attach the radio antenna wire to. I made my spring
by wrapping brass wire around a piece of fine brass tube. When the coils were
done, I removed the tube. I used pliers to bend a little hook on one end to
attach to the seat headrest, and I used a tiny wire eye bolt (a model
railroad detail) inserted into the other end of the open spring coil. I
tied my antenna wire to the eye bolt.
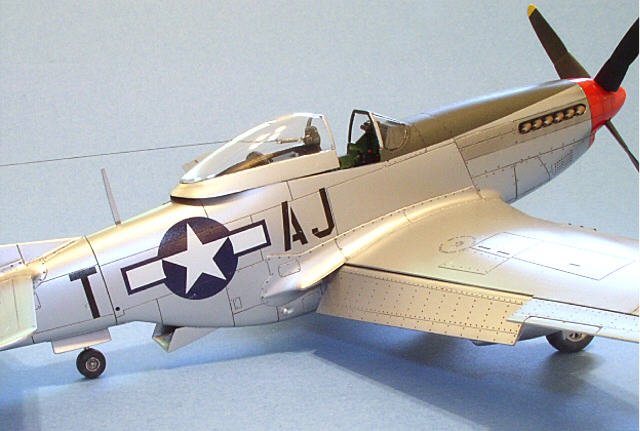
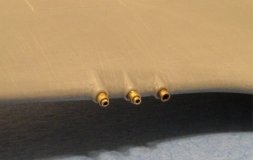
I improved the
gun barrels by replacing the plastic with 1/32" brass tubing for
the gun barrel inserted into 3/64" brass tubing, representing the cooling
jacket and/or blast tube. The inboard gun on each side does not
protrude from the wing like the remaining guns. Only a blast tube
shows.
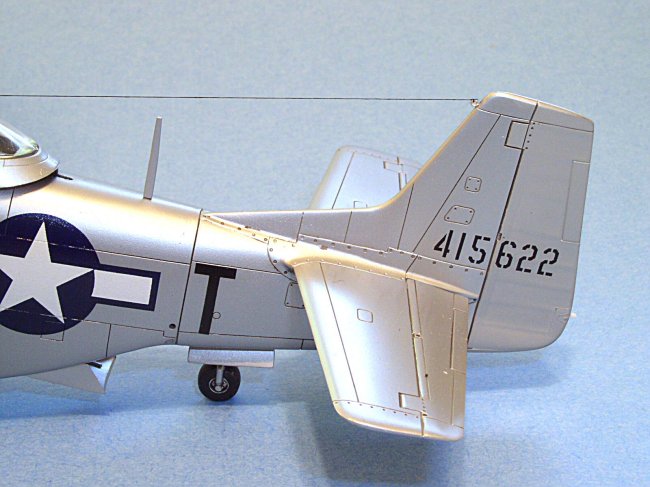
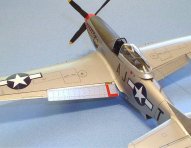
Finally, I had
read a lot about P-51's having the sheet metal between panels on the
wings filled and sanded smooth so the wing could be painted silver for
reduced drag. I used silver paint with a touch of gloss gray for the wings,
and used Alclad for the natural metal. This makes the wings look slightly
different from the fuselage, flaps, and ailerons.
Aeromaster decals were used, and
Solvaset seemed to work pretty well on them this time. The pictures were taken
indoors with flash and tripod, using an Olympus 4000C digital camera.
Chaz
|
Click on
images below to see larger images
|
|
|

|

|
|