|
As many of you know,
I have long followed the space program. I remember watching the first
space shuttle launch in 1981 and watching Columbia land two days later along
with the rest of my elementary school class. I also remember hearing about
Challenger when I was a freshman in high school a few years later when my math
teacher came in and told us about it. Since then I religiously followed
the space shuttle's return to flight and all the missions that followed. I
built a number of the Revell and Monogram 1/72, 1/144, and 1/200 shuttle kits
over the years and then the Revell ISS kit featured on ARC. I cheered when
the Hubble telescope was launched, and then repaired three years later. I
followed along when the shuttle flew to the Mir station and started building the
ISS. I watched a night launch live from Kennedy Space Center and two
landings at Edwards Air Force Base. And I got up early on February 1, 2003
to see if I could see the shuttle Columbia re-enter the earth's atmosphere (it
was too cloudy in Salt Lake). I heard CNN's Miles O'Brien announce that
there was a problem, that the shuttle had lost communications. Then the
awful truth about what was happening began to dribble out. I went to work
numb and in shock.
This year, as the
shuttle program was beginning to return to flight, I decided to build a new
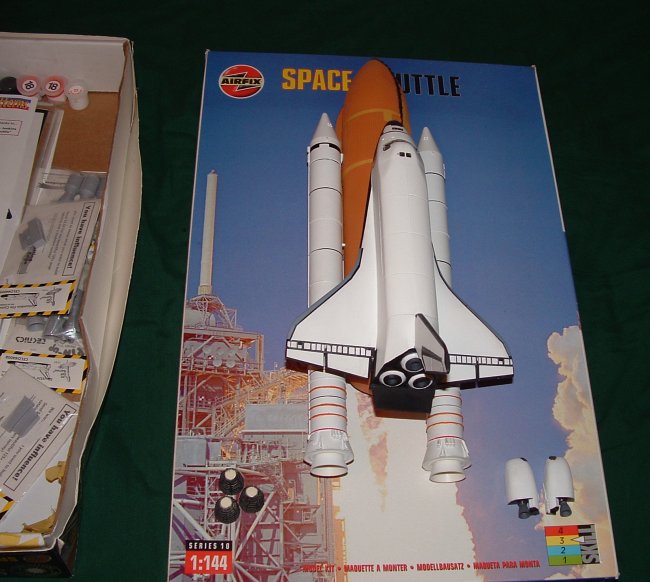
1/144 space shuttle stack. I had started on an Airfix kit a year before,
but I ran out of steam as I was trying to build the fuselage. But now that
the shuttle program was back in action, I really wanted to get something done by
the time Discovery launched on the return to flight mission STS-114. I
also decided to build the shuttle as the STS-114 stack. I had another
Airfix kit that I had bought a while back, one boxed as the Smithsonian Columbia
kit, so I used that as the kit, since I couldn't find the one I started on.
I really wanted to superdetail this one and get it done right. I had built
most of my shuttles before I found ARC and really improved my techniques.
This would be the first shuttle that I would be able to use my Iwata airbrush
on, and the first one with extensive aftermarket accessories and Evergreen
plastic detailing. This would also be my first Airfix shuttle stack.
|
Click on
images below to see larger images
|
|
|
 |
|
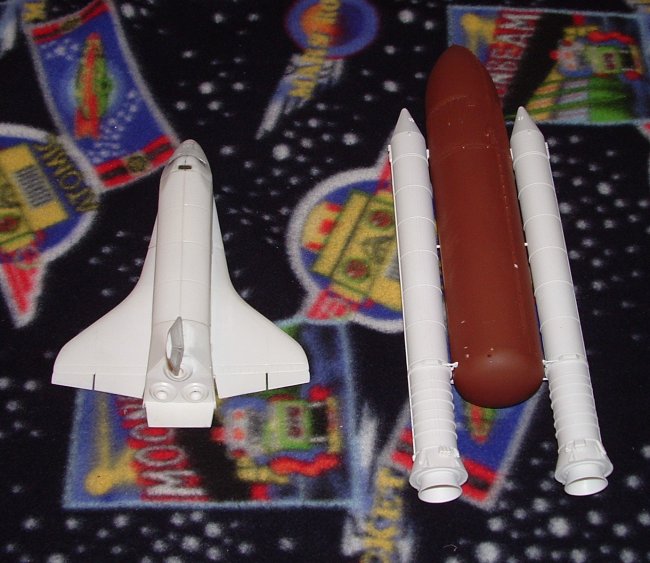
Everything started
off smoothly in April with the construction of the orbiter fuselage, wings,
external tank, and SRB set. The fuselage was built first, then the ET,
then the SRB's. I added the wings to the fuselage and added 20 second CA
glue at a few spots on the orbiter, the ET, and the SRB's to fill in gaps and
sink holes (the Airfix kit has sink holes in several spots on the SRB's).
It was at this point that I began to experience issues with one of the SRB's.
There was an unsightly gap in the right SRB's feedline that I could not get rid
of without sanding down the line too much. I then found the Airfix kit I
had started the year before and was glad I did, because it had a second set of
SRB's plus some decals and aftermarket accessories that I had stored in that
box. I got to work on the second set of SRB's and finished their assembly.
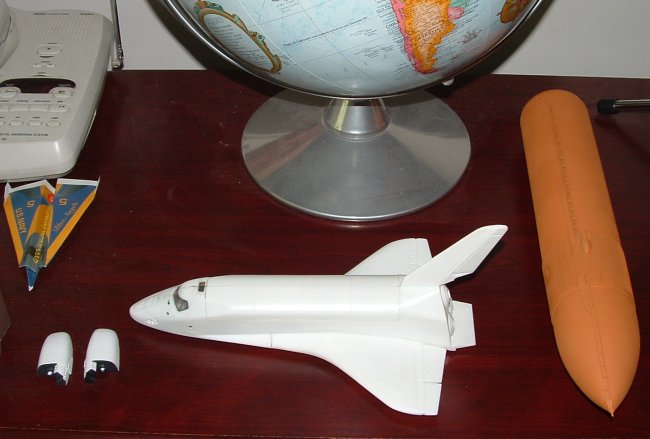
I also worked on the OMS pods, and I applied Tamiya tape in strips and small
squares to simulate the thermal blankets on those pods. I then used Evergreen
styrene to simulate the carrier panels with white tiles on the bottom of the
pods. My hobby knife worked well when I cut grooves in the carrier panels
to simulate tiles.
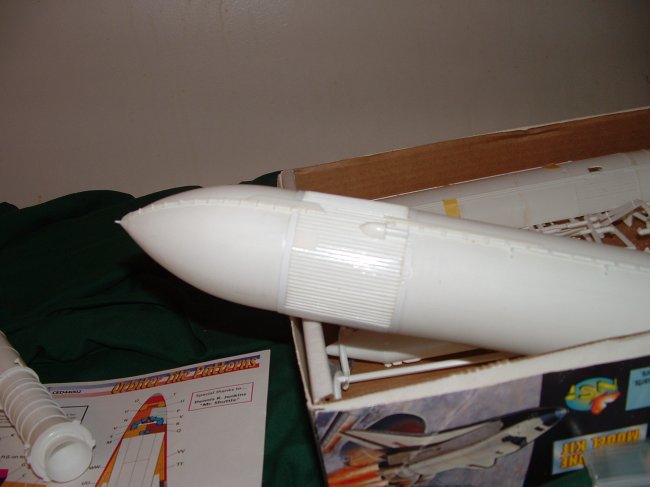
The biggest assembly
effort was on the ET. The Airfix ET is a good base for superdetailing but
the intertank area needs to be ribbed and the large LH2 feed line needs a
circular enclosure at the top of that line. The Revell kit has that
enclosure so I cut it off a Revell ET that I had and glued it onto the Airfix
kit. I used Evergreen .020x.020 strip styrene in 1 7/8 inch lengths as
ribs for the intertank area as well as .010x.125 strip styrene for the PAL ramp
(yes, the one that would cause so much angst on the return to flight) and
intertank boundary areas. A 1 3/8 inch strip was cut into the proper shape
for a foam ramp atop the intertank area, and a pair of rectangular styrene
squares went in the center of the ribbed areas, one in front and one in back of
the tank. Earlier, another set of squares had been glued, one smaller
square atop another larger square, then the squares were glued onto the back of
the intertank area facing away from the orbiter - the smaller square was painted
black during the painting process. I also glued on a pair of 1 7/8 inch by
7/8 inch .020 grooved sheets for the intertank detail at the SRB attach points
(and cut out notches for the SRB attachments). I used Tamiya liquid cement
to glue all this detail onto the tank. Afterward, I was ready to begin
painting the various parts of the stack.
Everything started well enough
when I masked off the orbiter's windows with New Ware masks. The Airfix
kit's windshield didn't conform exactly to the windows' shape, so there were
some areas where the masks touched a small sliver of plastic. However, the
Real Space Models decal covered those areas okay, though there was a little
struggle (more later). I had started to apply Tamiya tape to the orbiter
like I had to the OMS pods, but decided against using it to simulate blankets on
the orbiter itself as I was concerned about how the Black Magic masks would work
if I did that. (And I'm glad I made the decision I did, as those masks are
very sticky). I also was concerned about how the tape would look on the
orbiter itself after I saw it on the OMS pods.
I sprayed Painter's Touch white
primer on the orbiter and SRB's and Rust Oleum Rusty Metal Primer on the ET and
I focused most of my work on the ET at that point, using the half of the Revell
ET where I had cut feed line detail from to test out my various paints. I
settled on MM Acryl Yellow Ochre for the ET's main color and I'm glad I did as
it looked to be a near perfect match to all the pics I had of STS-114's stack.
I ended up using MM Acryl Hull Cream on the ET struts and initially on the
large LH2 feedline as well, but I decided I didn't like that and repainted the
feedline Polly Scale Italian Camouflage Yellow. The Italian Camouflage
Yellow also went on the scratchbuilt PAL ramp and intertank boundary areas, and
MM Acryl Orange Ochre went on the area near the very top nose cap of the ET.
Semi-gloss black went on the ET nose cap and some line areas as per the
reference pics I had. Finally, British A/C Interior Green and Ocean Gray
went on the orbiter attachment areas on the ET aft struts to match the colors on
the reference pics taken of the ET and SRB's before the orbiter went on the
stack. Also RLM 23 pink-red went on the ET to orbiter nose strut. I
was very happy with the job I did on the ET and got to work on the orbiter.
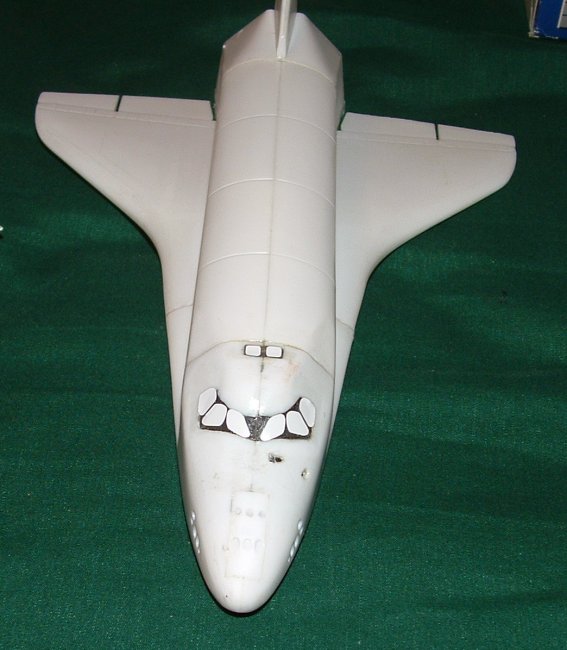
After sanding certain areas by the windshield smooth and several coats of white
primer followed by Tamiya gloss white, I used a combination of the New Ware and
Cutting Edge Black Magic masks to mask off certain areas of the orbiter, and I
used Aircraft Interior Black on the black areas and Polly Scale Haze Gray on the
gray RCC nose and wing leading edges. I unmasked the orbiter and was happy
at how it looked for the most part, except for a couple of areas that needed
minor touch-up. Also despite my following directions and sticking the
masks on my palms a couple of times, the Black Magic masks left a lot of residue
on the bird. Ugh. So I got Goo Gone as per directions and sprayed it
on then used a cotton cloth to get the goo all off. It worked fine and I
ended up with a good looking orbiter.
|
Click on
images below to see larger images
|
|
|
 |

|
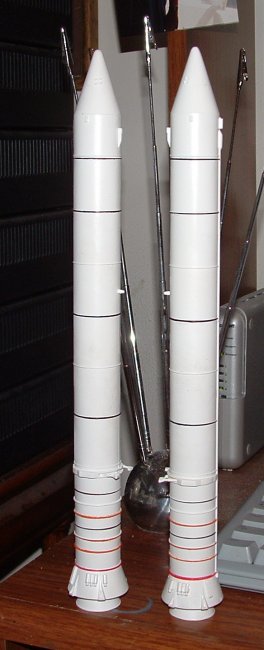
I figured I was on the home
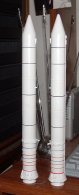
stretch, and I was all set to have the SRB's done by Memorial Day. But I
ran into some unexpected angst. First of all, I had sprayed a coat of
white primer and then gloss white, but I sprayed too far away from the boosters
and the finish was very grainy. So I sanded, and sanded some more...then I
was finally satisfied with the white primer then sprayed some gloss white.
I should have stopped there. They looked right to me and I debated whether
to do more. But I was concerned that the gloss was uneven, and I would
apply some decals, so I used Tamiya Clear to gloss the boosters more evenly.
I used a little too much. And I ended up with boosters that I would later
scrap! The finish was too far gone, so I finally got ANOTHER Airfix kit
from Douglas Models and built up the SRB's in the usual manner. I sprayed
white primer, and had a small mishap with one area, but I corrected that with
more sanding and primer. I FINALLY got a gloss white finish I was happy
with, on a good set of boosters. I masked off the O-rings and brush
painted them A/C interior black with three of the rings on the bottom of the
booster being painted Polly Scale Milwaukee Road Orange. There were areas
of "overbrushing" despite my efforts to seal in the tape with gloss
white, but they weren't too bad and I was able to use a Bare Metal Foil panel
line etching tool to scrape the extra paint off without making new panel
lines in the SRB's as there was an underlying coat of white paint. (Note:
the orange rings are supposed to be a little thicker, with black rings on them,
but I was concerned about further masking and ruining the finish, so I just left
them as is and am satisfied).
I applied the left SRB roll
marking decal and two small decals on the bottom of the SRB's from the Real
Space Models 1/144 decal sheet. I decided against putting the
"LOADED" decals on as I wasn't sure I'd like how they would look -
those LOADED decals looked a little large to me. I then glued the SRB's
onto the ET and let dry. I then slowly finished the orbiter, being
interrupted by a family trip to Vegas and some indecision about the CE tile
decals. I airbrushed interior black onto the CE decals as they were too
light - I applied the decals to the back of the OMS pods first (after painting
the back with interior black) to test them out and they looked a whole lot
better after I brushed interior black onto them. I sprayed the orbiter
with Future and then applied the tile decals to the bottom. The black
paint had made them a little brittle and they broke off in places. But I
figured they looked all right as they were pretty dark and the bottom of the
orbiter was already interior black. I also applied Real Space Models tile
decals to the OMS pods and to the windshield area - I had a hard time getting
the windshield decal lined up just right and had to tamp the decals down in
a couple of spots. This isn't due to the decals themselves, but rather to
the Airfix windshield area which doesn't match up completely right with the
orbiter's actual window structure. I also used the Real Space hatch and
window/nose warning markings and the CE tile decals for the black squares on the
payload bay doors. I also used blackened CE tile decals on part of the
black nose tile areas under the cockpit, but I cut off half the decal because it
covered over the RCS thrusters and didn't line up exactly right. (They
were designed for the Minicraft kit as I understand it). I used a hobby
knife to simulate some tile detail on the part that didn't get decals as well as
on the side chines and tail, it doesn't show up that well but I'm satisfied with
how it looks.
I sprayed the Real Space resin
main engines Testors Metalizer Gunmetal and the OMS bells Gunship Gray. I
had earlier masked off white areas by the SSME attachment points but I had to
touch them up numerous times with MM Acryl Bulwark White. I glued the
engine bells and OMS pods on, as well as a pair of New Ware PE umbilical
fittings painted silver. Those umbilical fittings are just below the OMS
pods. Finally, I masked off certain areas that are covered by blankets on
the real orbiter, and I brushed Polly flat base on those areas, and I finished
applying Real Space decals for the "United States" and CE NASA
"meatballs" and wing decals. I decided to call it finished at
this point - I could have done a few other things, such as applying lighter gray
decals or paint to a few panels on the leading edge RCC, but I wasn't in the
mood to do that. I learned my lesson when doing the SRB's - if something
looks right to you don't risk messing it up, no matter if you think there could
be more done!! The shuttle I had just built over three months wasn't
PERFECTLY accurate but was a whole lot closer than any others I'd done and
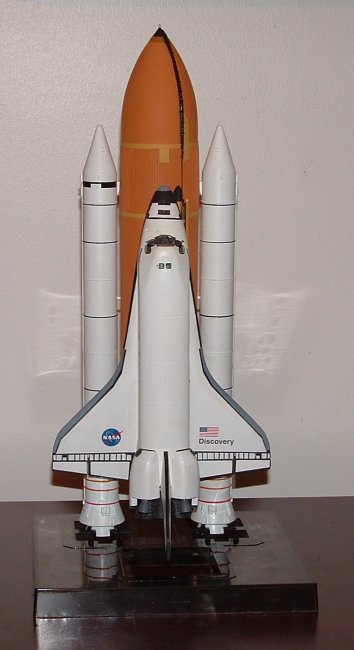
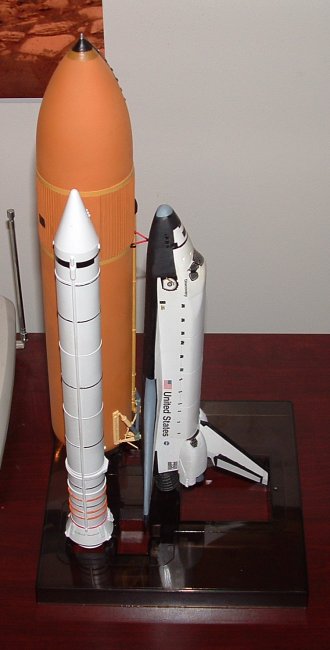
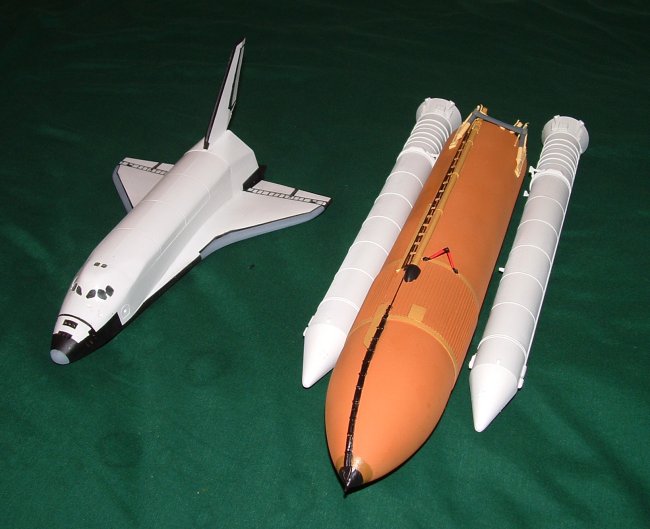
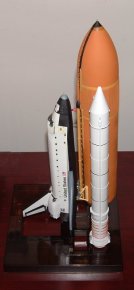
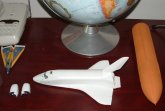
looked right, looked good to me. So I glued the orbiter onto the tank.
After it dried I was ready to get it upright - but the Airfix stack didn't fit
well on the Revell launch platform base so I dug out the Minicraft base that Jay
Chladek had mentioned in a thread on ARC and stacked the shuttle atop it....and
smiled. DONE AT LAST. I then started snapping away with my Fuji
camera. And now I'm thinking of what to do next...maybe another 1/144 ISS
with some stuff that just arrived from Real Space Models?? If I start
now...maybe I can get it finished by this time next year? We'll see!
But this shuttle has a big place of honor on my shelf.
Justin
|
Click on
images below to see larger images
|
|
|

|
 |
 |
|
|