|
ISAMU
SASAKI
From
the great number of truly heroic
acts made by the pilots worldwide, during
the Second World War,
only few
had the luck to be mediated as it should.
The
error of fighting under a flag that lost this
conflict
caused many heroic
acts to be forgotten. Together with them, courage,
skills, determination
and spirit of sacrifice
of many pilots was also
forgotten. In place of the gratitude deserved by any
other hero
many of them were blamed or
even thrown in jail.
In many cases they had to emigrate to places where their own name was not a
handicap anymore or they had to change their
names
and live their entire life
under another name.
Isamu
Sasaki was
one of those pilots.
A
few pilots could tell "I have downed a dragon - a B-29 Superfortress"
and lived to tell you that. In a single night action Sasaki
shot down three Superforteress
in a matter of minutes.
He
achieved his
first victory over Rangoon in 1942 and in two years he shot down a
total of 32 planes, twelve
large aircraft and 20 fighters.
At
the end of the war Sasaki had six B-29 destroyed and damaged another three. With a
total of 38 kills he ranks as number eight in the TOP of JAAF aces.
The last victories were achieved flying
an unmarked Ki-84 belonging to Army Test Centre from Tokyo.
I
made this model in honor of all the unknown heros - pilots from the second World
War.
THE
PLANE
Ki
-84 was a “Too little too late” in Japanese version. In search for a better
fighter the Japanese engineers manage to design a plane that could climb faster
and could outturn all his opponents.
Plagued
by low octane gasoline and poor quality of components, especially the engine,
this plane never reached its maximum potential.
During
the tests made after the war, this plane was able to reach 689 km/h at 20.000
ft. with 140 octane gasoline
and not the usual 78 octane used by the Japanese army.
A true
"Dragon hunter", the heavily armed version,
designed to intercept bombers was armed with 2
pairs of cannon, 2x20mm in the
fuselage and 2x30mm canons in the wings.
Unfortunately only
one plane survived until today. It is preserved in a Japanese museum.
THE
MODEL
The
“Skeleton Edition” or
Clear edition from Hasegawa has a lot of details. It comes with
photoetch parts and decals for two different airplanes.
Inside
the cockpit I used an Eduard zoom set (partially) only where I thought that
photoetched parts are looking better than originals.
I must say that Hasegawa has done a beautiful job in detailing this model.
|
Click on
images below to see larger images
|
|

|
 |

|
SKELETON
AND COCKPIT
The
skeleton is a pain in the … Gluing all the parts together is very difficult but
the worst thing is when you discover that on one crossing a part is not in
it’s place. After gluing (with a cianoacrylate glue) all the parts, I discovered that the structure
was too big to fit inside the fuselage.
Sanding
seemed the right way so I used a Dremel machine at low speed. It worked fine
until the head got stocked on a rib and broke several elements. The same thing
happened when I tried to sand the skeleton by hand.
It was very difficult to make the skeleton fit in the fuselage.
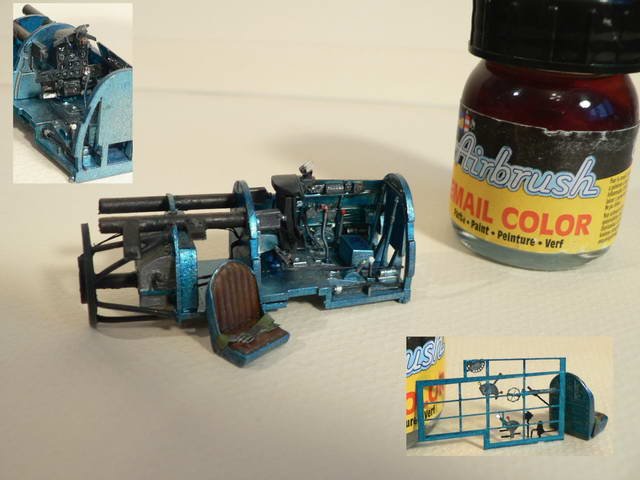
I
scratchbuild the oxygen tube from sprue and made a gauge from a decal. I have decided in the last moment to add the oxygen tube because it will
add a colour spot in a place where nothing will draw the eye. I also
scratchbuilt wires and pipelines and cables from copper wires.
The
cockpit was painted, washed (with different colours) and dry brushed several
times with different shades of colours, in order to add depth and that
marvellous look of a “used thing”.
Aotake colour from inside the cockpit was dry brushed with
aluminium.
The
left side of the cockpit made only from a photoetched part was also transformed
with the use of the Eduard set.
After
painting all the parts I realised that the two tubes that are covering the
machineguns are too small and the place between the engine and the cockpit is
not accurately designed by Hasegawa so I had to scratchbuild the tubes and a
floor that was enabling me to fix all the parts together (cockpit, oil tank,
fire wall …). The tubes were painted in black and dry brushed with rust.
The
engine was painted in iron, washed with blue (aquarela paints) then dry brushed
with aluminium. Finally electrical cables were added with help of thin copper
wire. I painted the wires in dark blue in order to give some colour to this
area.
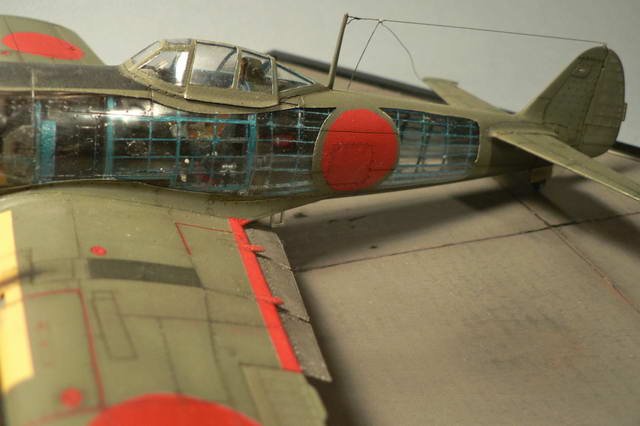
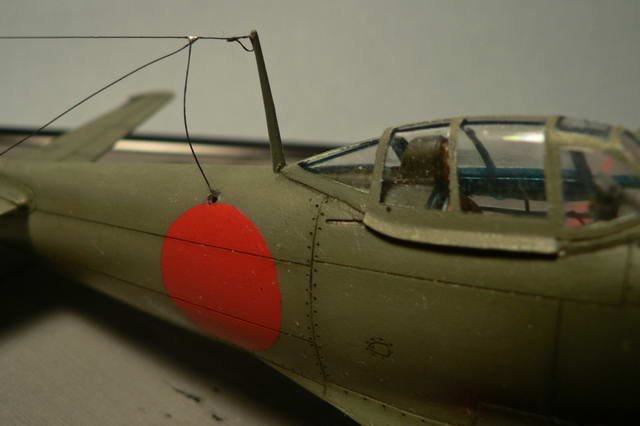
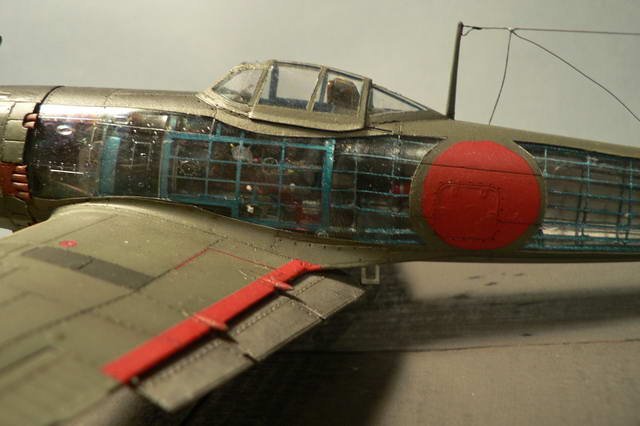
FUSELAGE
AND WINGS
I
had a serious issue regarding the transparency of the clear parts. Also on the
fuselage I discovered injection points which were visible on the clear
areas. Patience and sanding with a special substance (used for removing
scratches on plastic lenses) solved this issue. Finally a coat of ‘Future’
restored the shine and transparency of the plastic.
In
order to break the strait lines and escape from the toy look I cut
and repositioned the moving parts of the rudder, in a more "natural"
position.
The model
was pre-shaded with enamels and painted with acrylics after masking the
surfaces that had to remain transparent. I also used slight
post shading with a 10% lighter colour in order to obtain realistic
surfaces.
I applied a coat of Future, before applying decals and washing. Decals were
thick and reacted violently to “Solva Set” and ”Solva Sol”. To
solve this unexpected issue I had to paint the Hiromaru’s
and the yellow band from the wings. To
obtain the right yellow colour I applied a light gray and only then airbrushed
the yellow paint. For washing I used
thinned oil paints, a combination between black and terra ombra bruciatta
seemed to be the best solution.
I
scratchbuilt cannon muzzles and the pitot tube from syringe needles. The
antenna
was made from a thin fishing line.
|
Click on
images below to see larger images
|
|

|

|
|
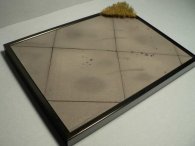
DIORAMA
For
a diorama I wanted a corner of the landing strip. I made it from 10cm pieces of
cardboard, arranged at an angle from the margins of the frame.
The landing strip was painted, washed and drybrushed.
This
model was meant to be my entry in to the PACAIR Group build. Unfortunately the
group build ended by the time I was able to finish only the cockpit.
It
was a difficult build (I ended breaking the landing gear several times) and I
will not start a new skeleton edition in
the near future.
Christian
- Romania
|
Click on
images below to see larger images
|
|

|

|
|