|
Autogyros are strange, but by no
means dysfunctional members of the large aircraft family. For me, if they are
weird, is good enough to try to model them. Azur gives the chance with their
little cute kit.
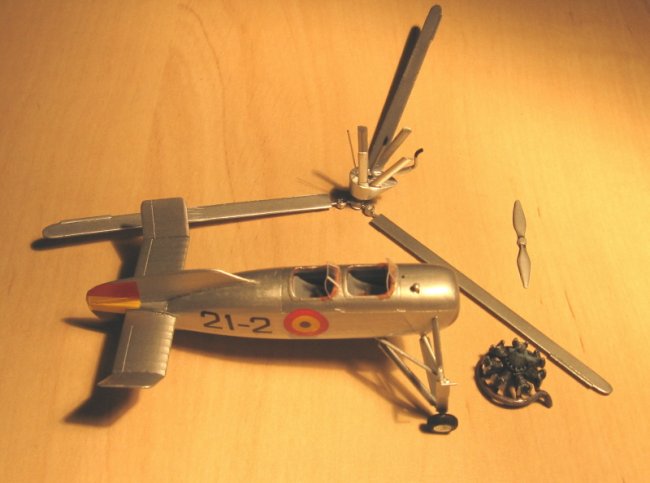
What you get is what you would expect if you have spent some time in the hobby:
short run technology injected parts, a few resin bits (engine, exhaust
collecting ring, rotor head and a tiny bottle of beer (so I like to imagine)
that goes in the top of the front fuselage to please you during the flight. Vac-formed
(or de-formed) windshields, an outstanding decal sheet and clear enough
instructions complete the package.
You will find delicate, precise surface detail coupled with the sad absence of
positive locating devices (although the position of the parts is lightly marked
in the correspondent places).
|
Click on
images below to see larger images
|
|

|
 |
The interior is
mildly catered but good enough, the transparent vac parts, even with a
magnifier, are indiscernible from their surrounding plastic, so good luck there,
fellows. I made mine from bent acetate sheet.
The fit in general is good, and take notice that because of complicated
aerodynamic reasons, difficult to explain without the help of an abundant wine
supply, the horizontal tail parts have opposed lift (one side will be cambered
the other way). That is correctly depicted in the locating profiles in the sides
of the fuselage, where the tail parts are to be glued.
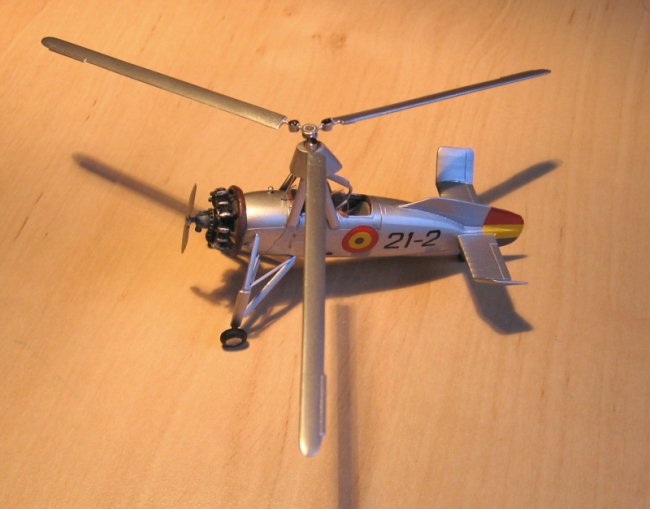
The only part that seems an
invitation to disaster is the rotor head, molded in a very fragile resin that
probably will not support the weight of the rotor blades and would be very
difficult to remove from the pouring block without some degree of damage. Alas,
another has to be resourced as you may please. For mine I used just the resin
central hub, which I drilled for the main rotor axis and the three blades (arghhh!).
Short pieces of pin were cut and inserted there and into the blade roots
-previously drilled too-. A photo-etched part from the ever useful cornucopia
(a.k.a. spares box) capped the rotor hub, and three pieces of plastic tube were
inserted also as "dampeners". Later I inserted a piece of brass tube
into the supporting structure of the rotor to allow it to rotate freely. One day
in the future I may add some wires that seem to run from those dampeners to the
blades.
A workable painting sequence will make you scratch your head, due mainly to the
rotor supporting structure that will hinder your access for masking the interior
and installing the windshields.
A little challenge will be to find a way to deal with the aligning and gluing of
the above-mentioned structure.
During construction, the double control bar executed from the tweezers the well
known quadruple death somersault. The part was miraculously found when was about
to be engulfed by the universally feared carpet monster*.
Another extra I added is the (most likely a) pitot tube and support on one of
the struts of the landing gear, which I found in many images of the real thing.
This sort of complicated flying umbrella-cum-fan has a spider-designed landing
gear, that will be the delight of poor-sighted, ham-handed modelers. Not
impossible to build, though, by any means, if you are a Shaolin Monk and/or
watched enough TV episodes of "Little Grasshopper".
|
Click on
images below to see larger images
|
|
|

|

|
* Is the carpet
monster a species officially recognized by science? To what Filum it does
belong? Does it only dwell in the carpets that cover the floors or modeler
homes, or can it be found also elsewhere? Is it an evolutionary relative of the
terrible office monster, that sustains itself on files, pens and other objects
that also tend to disappear?
Does Its diet consist of just plastic, resin and metal tiny parts or was there
any case of a modeler being also eaten? Is there any photographic evidence that
modelers around the world can provide? Any takers?
Gabriel
|
|