|
Prototype:
The
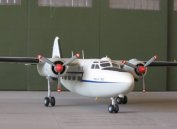
Percival Pembroke first flew in 1952, 45 examples entering RAF service the
following year. It was based on the civilian Prince, but with an increased
wingspan to allow a greater weight to be carried. The Royal Navy used another
version of the Prince, renaming it the Sea Prince, and the Pembroke was also
used by the air forces of West Germany and Belgium.
In RAF service it served mainly in the light communications role but
could also carry out photographic reconnaissance if required, a number being
modified for this role.
It
served in several overseas locations, but it is probably best remembered for its
role with 60 Sqn as a general transport and communications hack in RAF Germany.
The current Special Hobby boxing describes it as a “Cold War Spy Plane” - I
have not been able to find any further information on any clandestine roles, but
it would certainly make sense given that part of it’s routine work would have
involved overflying the DDR in transit to and from Gatow. There are certainly a
number of interesting lumps and bumps visible in some of the published
photographs which could correspond to camera mountings or aerials.
A
refurbishment programme in 1970 re-sparred a number of aircraft to extend their
lives, and the remaining seven were finally withdrawn from RAF Wildenrath in
1988.
|
Click on
images below to see larger images
|
|

|

|
|
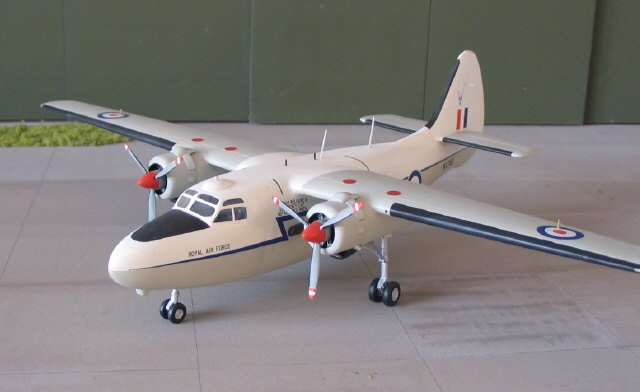
Model:
I
used the original boxing of the Special Hobby kit, which only includes decals
for West German and Belgian aircraft, so I bought the appropriate Model Alliance
sheet to provide the RAF decals. I
believe the solid nose on the RAF version may be different from that provided in
the kit but I couldn’t see how so I ignored it.
The
Special Hobby kit is rather nice. In common with most short-run kits there are
no locating pins and the sprue gates are quite thick, but the parts clean up
nicely and the mouldings are very crisp with finely engraved panelling. This is
especially true of the moulded transparencies which are spot on.
Full interior detailing is provided, including passenger seats and
fittings to set out the cabin as a wireless operator’s classroom, and a nicely
detailed cockpit. Hardly any of it is visible once the fuselage is closed up.
The fuselage windows are a simple interference fit in the holes, there are no
flanges or any other locating aides so I had the bright idea that leaving them
off until painting was complete then fitting them from the outside. That way I
could save a lot of tedious masking later by just bunging the holes up with
Maskol. Big mistake, more of which later.
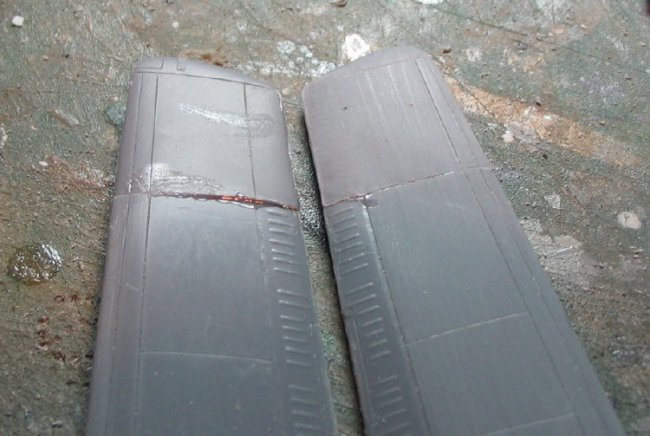
The
interior and fuselage went together well, except that I managed to get a small
step in the fuselage halves. This is entirely avoidable and down to my ham-fistedness
rather than any fault with the kit, but explains why there is so much filler
around this seam on the photographs.. The kit is very tail heavy so I crammed as
much chopped up lead sheet as I could fit into the nose cone and under the
cockpit floor. If you choose to model the version with the clear nose panel I
imagine you will have problems here, although given the limited view through the
cockpit windows you could probably fill that with lead too and no-one will
notice.
The
kit includes optional parts to model the original Prince wings or the extended
Pembroke ones, and it is here that I encountered the only major problem - the
wing extensions are a bit thick. However, 5 minutes with a large file followed
by sanding and re-scribing fixed that. The wing tips themselves are moulded as
separate transparencies allowing the navigation lights to be modelled by simply
masking them off.
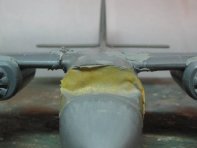
Attaching
the wings to the fuselage repays care and attention in getting everything set up
square, and there is some filling to be done to achieve a smooth join. It is
very easy to get the wings straight but the fuselage slightly skew whiff, and it
is a pain to correct. There was a slight difference in levels on one side, cured
by more filler. I eventually got everything square and level, and left it on one
side for a week until everything had set solid. The engine nacelles will also
require filler around the wing leading edge to get a smooth join.
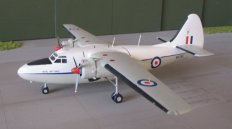
Painting
was carried out with Halfords white plastic primer, followed by Citadel Skull
White for the upper fuselage and Xtracolour Light Aircraft Grey for the rest.
The Skull White dries matt, so a couple of coats of Future were applied where
required for decals.
I
always think decalling is the best bit and was looking forward to trying the
Model Alliance decals, but I was sadly disappointed. Don’t get me wrong, they
are beautifully printed, crisp and in register, there are enough for two
aircraft and they go on a treat. However, the underwing serials are too big,
there are no stencils, and the instructions are just wrong. Sorry.
At
first I thought this was just down to me not having the reference quoted on the
instruction sheet, so I spent quite a while studying the many Pembroke photos on
Airliners.net thinking these may be just minor variations in livery. Then I
noticed that the graphics on the instructions didn’t match the thumbnail
photos which MA had helpfully provided on the same instruction sheet !
Apart
from the underwing serials, the diagonal ‘flash’ on the blue cheatline goes
in front of the leading window not through it, both anti glare panels provided
are the wrong shape, the demarcation between the white fuselage top and the grey
wings is straight not curved, and the prominent red AVTUR filler markings on the
top of the wings are shown on the instructions but not provided on the sheet.
The instructions suggest using the kit stencils, which are incorrect for an RAF
machine (and in any case are in Belgian or German) and the roundels are so thin
that the grey/white demarcation line shows through on the fuselage sides. I know
this latter problem affects most aftermarket roundels but a couple of white
blanking discs would have helped. Sorry, but at nine quid a sheet this was a bit
disappointing, especially compared to some of their other releases.
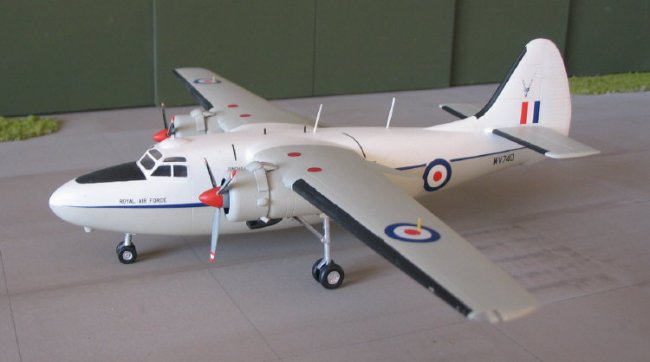
Since
I was going to have to make up the underwing serials myself I went for WV740,
for the simple reason that it had plain grey props rather than stripey ones, and
that meant less masking. AVTUR filler dots came from the spares box and I have
ignored the stencils for now.
Once
decalling was complete I gave everything a coat of Humbrol acrylic satin
varnish. The real aircraft were gloss but this does not scale down well and I
therefore never use full gloss on a model. Then I set about the windows.
The
theory is simple - test fit the window in the hole, file to fit as required,
then glue in place with a bit of Clearfix. Hmm. There followed a lot of shaking
and poking and general faffing about trying to fish loose windows out of the
inside, but eventually they were all done. Next time I’ll fit them while the
fuselage is still in two bits, at least then you can get behind them easily to
push them back out a bit if necessary.
The
finishing touches were the camera (?) fairing under the nose and brass strip
aerials.
Conclusion:
I
enjoyed building this. It’s different, it went together fairly painlessly and
it looks good sharing the tarmac with my 2 Sqn Jaguar. Recommended.
Stuart
|
Click on
images below to see larger images
|
|
|

|
|
|