|
Well
I'm not going to go into the history of the F-16.. that has been well covered by
now.
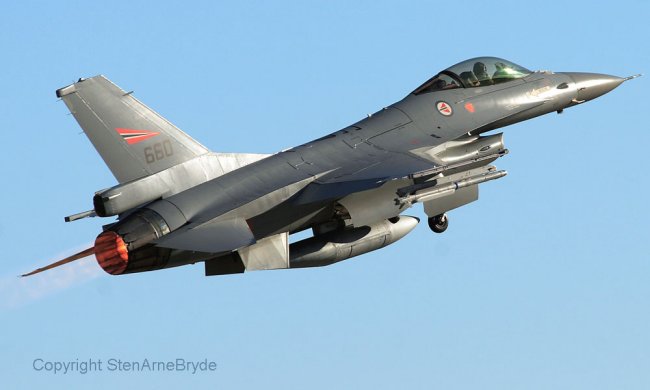
This
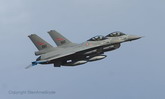
jet USAF serial 80-3660, tail number "660" was one of
the first Block 15's delivered to the RNoAF and served for many years with 334th
sqd based at Bode AB in Northern Norway. It was MLU upgraded in 2001 and
upgraded to M5 standard last winter
I wanted
to build an RNoAF F-16 AM (MLU) for
many years now and when Tamiya announced a Block 25/32 viper my mind was
set. I've been waiting for the Kinetic
one for some time, but figured the Tamiya one could be rebuilt to Block10/15
standard without to much hassle as most of the parts are in the kit from the get
go. I needed the A-style dragshute tail and some other minor details.
Tamiya has issued a photoetch set for this kit that also can be used for an
AM/BM/MLU build. I knew some
scrachbuilding had to be done, but this was easier than I'd anticipated. And the
build itself went relatively painless. I know some small blunders I did though.
The call number on the tail is the wrong font, and I forgot about a couple of
panel lines.
The
Build:
The basic kit is the 1/48th Tamiya F-16 Block 25/32 rebuilt to F-16 AM Block 15
standard using
-
Resin A-style tail with dragshute from Wolf pack (and a lot of
milliput)
-
IRIS-T missile "borrowed" from the Revell EF Eurofighter
-
Tamiya PE for F-16 C (scab plates, AOA
sensors and pitot tube)
-
JHMTS "robot".. Hasegawa throttle grip for F-16 modified to look like
the JHMTS sensor.
-
Decals from Zotz, Hasegawa, Tamiya, Vingtor and the scratch box
-
various details scrachbuilt
The
main issue for this build is the tail area. The kit fuselage is matched up to
the C-style tail that's allot larger than the A-style tail I was going to use.
After cutting off the mounting lugs I filled it up with Milliput making sure to
mould it as close to the fuselage shape as possible. When dry I sanded the
miliput to shape and rescribled the panel lines. The resin tail is a beautiful
thing. It's just the tail base so the top has to be taken from the original kit.
These two parts fit nicely together and the tail was then "blended"
into the fuselage using Tamiya putty and some sanding to make it look like it
was stuck on.
One
other detail is the searchlight just below the RWR blister on the left-hand side
of the nose. I drilled this out and used a blob of milliput to make some
backing. and a tiny "spike" for the bulb, and finishing up using a
drop of Clearfix to simulate the glass.
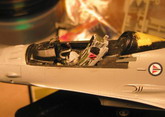
The
M5's have a JHMTS sensor located just behind the pilots shoulder was made from a
Hasegawa F-16 throttle grip. As I use Aries cockpits for my Hase'vipers I
have a load of these in my scrachbox. I cut the top to a cubical shape,
added a little wire that runs along the inside of the canopy frame and painted
the "robot" flat black. All done.
The
cockpit is basically the same as any C-viper except for the colors.. the panel
lines are all black in the MLU, this is allot more pleasant for the pilot when
using NWGs than the gray panel lines in the C-, that lights well up when using
NWGs. The two MFDs are black when not active but I wanted a little more life in
them so I cut the decals for these to shape and used a drop of Clearfix to make
the glass. I also used clairfix to simulate glass on all instruments. The seat
is also kit-issue with the straps from Tamiya's PE set made for the viper.
The cockpit looks rather boring so I figured I'd add a little life to it. So I
took the pilots head from the box, removed all the fleshy parts, and sat the
helmet on the seat to liven it up abit.
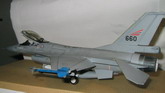
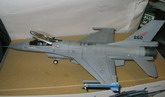
Click on
images below to see larger images
Painting
and weathering the viper:
RNoAF
Vipers are all light gray so the paintjob is fairly strait forward. After a
layer of Tamiya primer I preshaded using Extracryllix FS 36118. This is a little
easier to work with than flat black as many use. After this the main fuselage is
painted Extracryllix FS 36270. The radome and RWR blisters I used the same color
but added a couple of drops of FS36118. The canopy frame has a black lining and
this was masked off and then painted. All leading edges, wings, tail planes
and tail have a protective tape layer. This has a yellowish color to it, I
masked the areas off and gave it a light layer of Tamiya clear yellow.
When
I saw this particular plane last it was just out of the paint shop and clean as
a whistle so I decided to add a little subtitle weathering. Using pastels I
added a little grime where crew would normally walk on the wings and fuselage
during flight inspections. And also a light wash to emulate fuel spills over the
wing fuel cells. The underside also got some light weathering to simulate
rubbers platter picked up during landing in rain/wet conditions. When happy with
the basic weathering I sealed it off with future/klear and set the jet to dry.
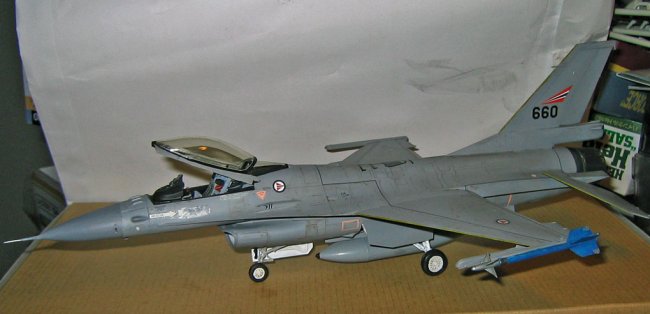
Armament:
When
I saw this jet it was configured for BFM (Basic fighter manuvering trading) and
had a light loadout. One CAPAM-9L on the wingtip, One Captive AIM-2000
IRIS-T and a centerline fuel tank. I used one of the AIM-9's from the kit,
cut of the rollerons on the tail planes. Paint was Tamiya royal blue and
gunmetal on the seeker head. The IRIS-T was stolen from a Revell
Eurofighter kit and painted FS36375 (light ghost gray) with a blue
"captive" band on the engine.
Decals
and finishing.
There
are no decal sets that depicts a RNoAF M5 F-16 so I had to put the decals
together from various sources. Vingtors absolutely fantastic F-16
(check www.vingtor.net
for details) sceet is the main "supplier" along with details from VV2
by Zotz and Hasegawa. All reacted well to MicroSol and when dry a layer of Klear/Future
sealed the decals off. Some light weathering using pastels and a light
wash of burnt sienna and black to blend in the decals and I was all done. I
did final assembly of the landing gear and tail planes, radome , doors and other
small bits and pieces.
This
was a very satisfying project. The build went relatively painless and it turned
out better than I expected. The Tamiya kit is crisply detailed and easy to
work with, so all in all I'd say this was an easier build than the standard
Hasegawa viper conversion projects I've tried over the years.
And
not having tried the Kinetic kit yet I'd say this is a better way to go on
building an MLU upgraded Viper than using the Hasegawa kit as base. You
don't really need to replace the cockpit as the kit one is fairly decent with a
little work and close to all the parts you need are in the kit, except for the
tail.
Sten
Click on
images below to see larger images
|